How to create VM template in Proxmox VE from Ubuntu Cloud-Init image
This is a simple guide to create a reusable VM template in Proxmox VE from an Ubuntu Cloud-Init Image. I've documented this process for my own reference as I'm still learning Proxmox, but thought it might be useful to share.
I’m running a Proxmox VE v7.4 cluster, and will be using Ubuntu 22.04 (Jammy) Cloud image as the base for the template.
Without further ado, let's get started!
Create the Base VM
First, gain access into the physical node (via ssh) where you want to the VM template to be created.
Run the command below to create a new VM with basic specifications.
~# qm create 9001 --memory 2048 --core 2 --name template --net0 virtio,bridge=vmbr1
I’m allocating 2GB for memory and 2 cores for CPU for a minimalistic setup, and assigning the VM an ID 9001 and name template . You're free to configure the VM however you want.
This creates a .conf file under /etc/pve/qemu-server/ that can be edited manually, but using the qm command is recommended.
You can locate the file by its ID as follow:
~# ls /etc/pve/qemu-server/9001.conf
Check Available Storage Pools
You'd first identify what storage pools are configured for the physical node that you're currently working on. Run this command to find out:
~# pvesm status

Name         Type     Status           Total            Used       Available        %
local         dir     active      1740823328      1234441696       417878952   70.91%
In my case, the local storage is the only option I have, and I'll be using this storage pool throughout this guide.
Download the Cloud Image
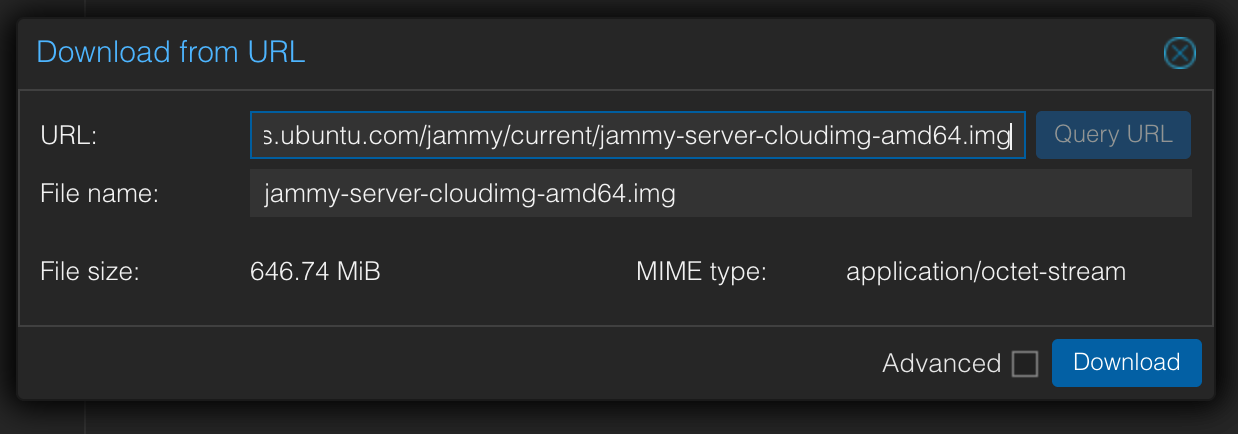
If you're using an Ubuntu cloud image like I do, you can grab the image from the official source: https://cloud-images.ubuntu.com/. These images come with a lean Ubuntu system with built-in Cloud-Init specifically for cloud environments.
I have my image downloaded onto the node's local storage. You can download to any other storage types (e.g. ZFS, LVM) that are available to you.

Proxmox VE also provides a hassle-free way to download the image by simply passing in the image URL.
To list the images available in your storage:
~# pvesm list local

local:iso/jammy-server-cloudimg-amd64.img    iso     iso          678153216
Import the Cloud Image as a VM Disk
Run the command below to import the cloud image into the VM as a new virtual disk.
~# qm importdisk 9001 jammy-server-cloudimg-amd64.img local

importing disk 'jammy-server-cloudimg-amd64.img' to VM 9001 ...
Formatting '/var/lib/vz/images/9001/vm-9001-disk-0.raw', fmt=raw size=2361393152 preallocation=off
transferred 0.0 B of 2.2 GiB (0.00%)
transferred 22.5 MiB of 2.2 GiB (1.00%)
transferred 45.0 MiB of 2.2 GiB (2.00%)
...
transferred 2.2 GiB of 2.2 GiB (100.00%)
transferred 2.2 GiB of 2.2 GiB (100.00%)
Successfully imported disk as 'unused0:local:9001/vm-9001-disk-0.raw'
This copies the image into your chosen storage pool (e.g. local) and creates a new virtual disk for that VM.
The imported image will be added as an unused disk in the VM's hardware configuration, meaning it is available but not yet attached to a specific bus or device inside the VM.
To verify the creation of the disk:
~# pvesm list local

Volid                                        Format  Type              Size VMID
local:9001/vm-9001-disk-0.raw                raw     images      2361393152 9001
local:iso/jammy-server-cloudimg-amd64.img    iso     iso          678153216
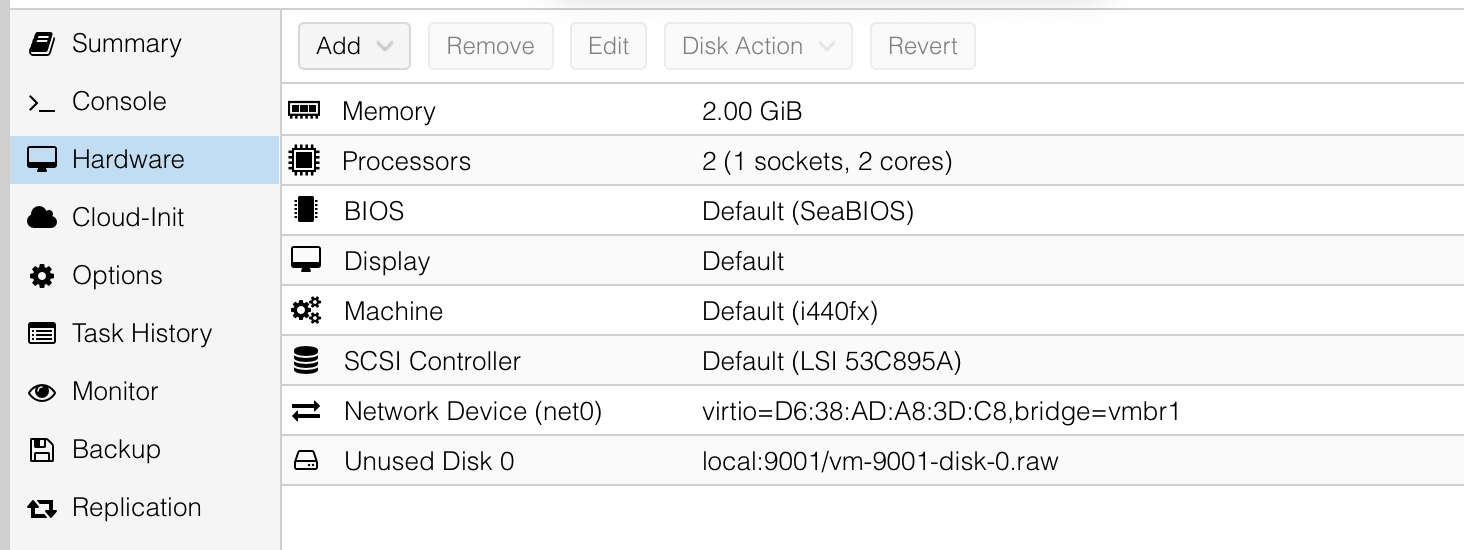
This is what the Hardware tab looks like for the VM at this stage:
Attach the Disk to the VM
To allow the VM to boot from the imported disk, you'll have to attach the disk to the VM by running this command:
~# qm set 9001 --scsihw virtio-scsi-pci --scsi0 local:9001/vm-9001-disk-0.raw

update VM 9001: -scsi0 local:9001/vm-9001-disk-0.raw -scsihw virtio-scsi-pci
This sets the SCSI controller for the VM and attaches the disk image as the first SCSI disk (scsi0) on that controller .
Add a Cloud-Init Drive
Run the following command to create and attach a Cloud-Init drive to the VM on the IDE2 device interface.
~# qm set 9001 --ide2 local:cloudinit

update VM 9001: -ide2 local:cloudinit
Formatting '/var/lib/vz/images/9001/vm-9001-cloudinit.qcow2', fmt=qcow2 cluster_size=65536 extended_l2=off preallocation=metadata compression_type=zlib size=4194304 lazy_refcounts=off refcount_bits=16
ide2: successfully created disk 'local:9001/vm-9001-cloudinit.qcow2,media=cdrom'
generating cloud-init ISO
The Cloud-Init drive is typically attached as a CD-ROM or virtual disk so the guest OS can read configuration data such as hostname, SSH keys, network settings etc. to initialise the system accordingly during the first boot.
Cloud-Init drive in Proxmox VE works by generating an ISO image to pass the Cloud-Init data to the VM when attached as a CD-ROM. For that purpose, all Cloud-Init VMs need to have an assigned CD-ROM drive.
To verify that the Cloud-Init drive was successfully created:
~# pvesm list local

Volid                                        Format  Type              Size VMID
local:9001/vm-9001-cloudinit.qcow2           qcow2   images         4194304 9001
local:9001/vm-9001-disk-0.raw                raw     images      2361393152 9001
local:iso/jammy-server-cloudimg-amd64.img    iso     iso          678153216
Configure Boot Options
Now, set the VM to boot from the imported (primary) disk attached at scsi0:
~# qm set 9001 --boot order=scsi0
Configure Display Options
For Cloud-Init images, it's often necessary to configure a serial console:
~# qm set 9001 --serial0 socket --vga serial0

update VM 9001: -serial0 socket -vga serial0
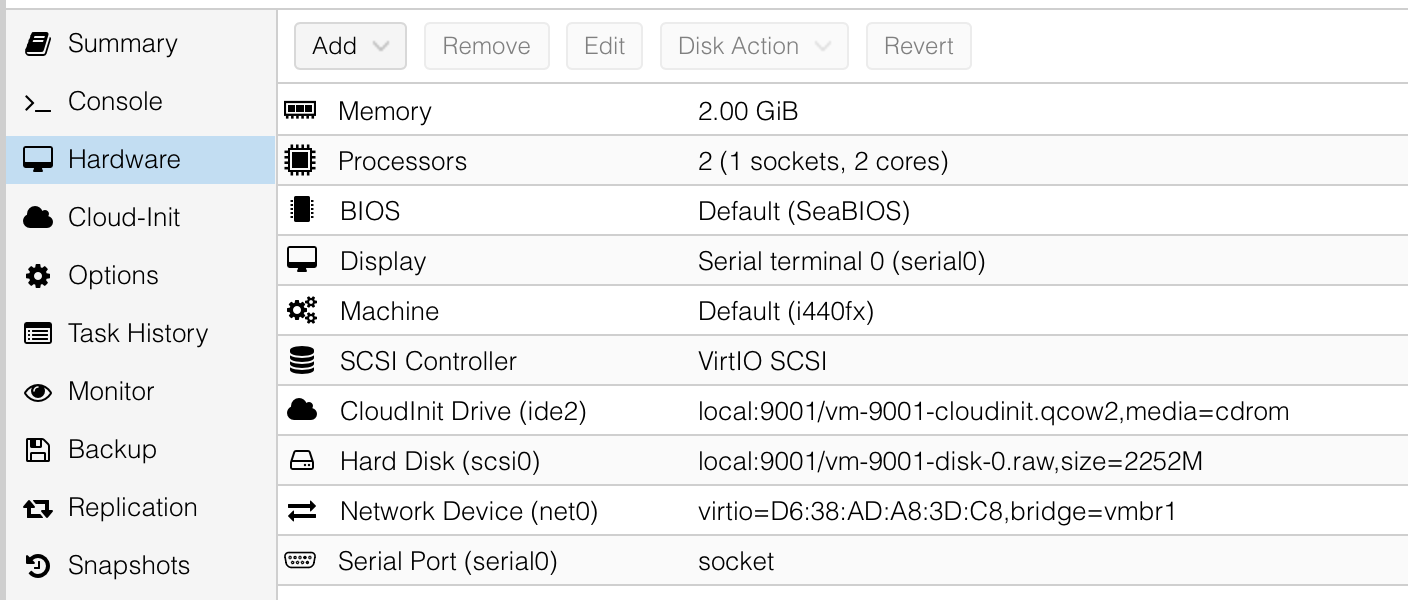
This is what the Hardware tab of the VM looks like after going through all the steps.
Final Configuration and Template Conversion
Before converting into a template, you should review and make any final adjustments to the VM (memory, CPU, disk space, etc.).
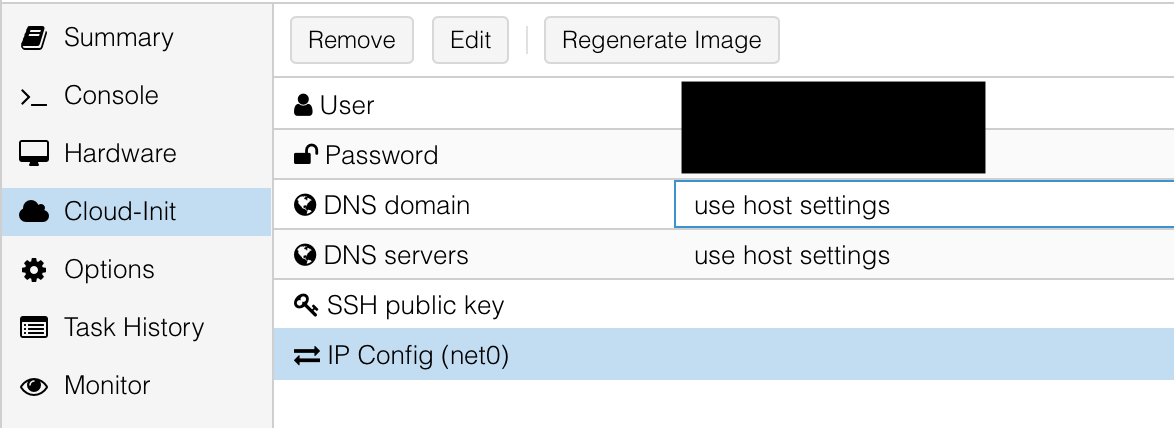
Then, go to the Cloud-Init tab and fill out the necessary settings (user, password, SSH keys). I’d typically leave out the IP Config settings to avoid hardcoding network settings (especially IP addresses) inside the template.
As final step, convert the VM into a template by right-clicking on it on the sidebar and selecting Convert to template .
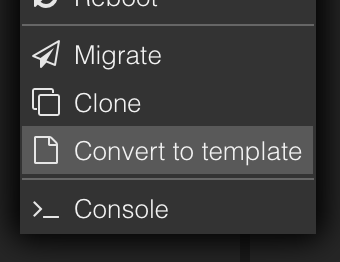
And we’re done! 🥳
Using the Template
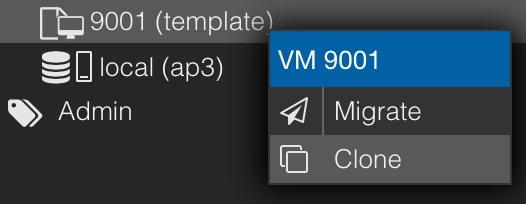
To deploy a new VM from your template, you simply have to:
- Clone the template into a new VM by right-clicking on the template →
Clone, and fill out the details in the pop-up window.
- Adjust the hardware settings of the cloned VM if needed (memory, CPU, disk).
- Edit the VM’s
Cloud-Initsettings (e.g. to give it a static IP and a gateway). - Start the VM.
That's it! This process saves a lot of time when you need to deploy multiple similar VMs from a Cloud-Init template with minimal effort.